I've been in my new digs for about a week or so, and my first and foremost task has been to migrate an "application" that I (mostly) wrote in MS Word 1997-2003 to work in a Windows 7/Office 2010 environment. On the whole, the migration is a smooth seamless process when it comes to processes in the code itself. VBA is VBA regardless of whether the base is 2003 or 2010. The issues start to arise when the time came to create the custom interfaces.
Back in the 2003 days, the way to get the specific functions in front of the user was through either:
After migrating the templates and code forward to 2010, all the customizations we did still were there, but packaged in a god-awful "Add-Ins" tab (what was formerly known as a menu) at the end of the list of standard tabs. Yuck. Nobody in their right mind would think that an appropriate solution to put before the end user. I certainly couldn't do it in good conscience. So, I started poking around the web, looking for methods, instructions and tools that would help me to:
Microsoft publishes an incredibly lame tool with the glib and catchy name of "Custom UI Editor for Microsoft Office" (hereafter to be known as CUIEMO) that is, well, functional, I guess. I picked it up here. It is needed downstream in my convoluted process. But for creating the ribbon from scratch, ugh. I really wouldn't like it.
The other tool I found is extremely useful, and intuitive. It's drawback is that it doesn't create native 2010 XML; it creates customUI.xml files rather than customUI14.xml files. The cool tool is an AddIn for Excel. Yes, Excel. To customize Word ribbons, I am using Excel. If nothing else, one must learn to be flexible when dealing with Microsoft products!
The AddIn is called the RibbonX Visual Designer, developed by Andy Pope, and is available from his website. Below are screen shots between the two tools. I'll let you choose which you think is more useful for designing your custom ribbon.
Back in the 2003 days, the way to get the specific functions in front of the user was through either:
- customizing the standard menu;
- customizing the standard toolbar(s);
- creating a new menu;
- creating a new toolbar;
After migrating the templates and code forward to 2010, all the customizations we did still were there, but packaged in a god-awful "Add-Ins" tab (what was formerly known as a menu) at the end of the list of standard tabs. Yuck. Nobody in their right mind would think that an appropriate solution to put before the end user. I certainly couldn't do it in good conscience. So, I started poking around the web, looking for methods, instructions and tools that would help me to:
- Eliminate the "Add-In" tab and get back to meaningful named tabs;
- Get back to context sensitive tabs and functions based on document type (template) where only the one custom tab would be visible.
Microsoft publishes an incredibly lame tool with the glib and catchy name of "Custom UI Editor for Microsoft Office" (hereafter to be known as CUIEMO) that is, well, functional, I guess. I picked it up here. It is needed downstream in my convoluted process. But for creating the ribbon from scratch, ugh. I really wouldn't like it.
The other tool I found is extremely useful, and intuitive. It's drawback is that it doesn't create native 2010 XML; it creates customUI.xml files rather than customUI14.xml files. The cool tool is an AddIn for Excel. Yes, Excel. To customize Word ribbons, I am using Excel. If nothing else, one must learn to be flexible when dealing with Microsoft products!
The AddIn is called the RibbonX Visual Designer, developed by Andy Pope, and is available from his website. Below are screen shots between the two tools. I'll let you choose which you think is more useful for designing your custom ribbon.
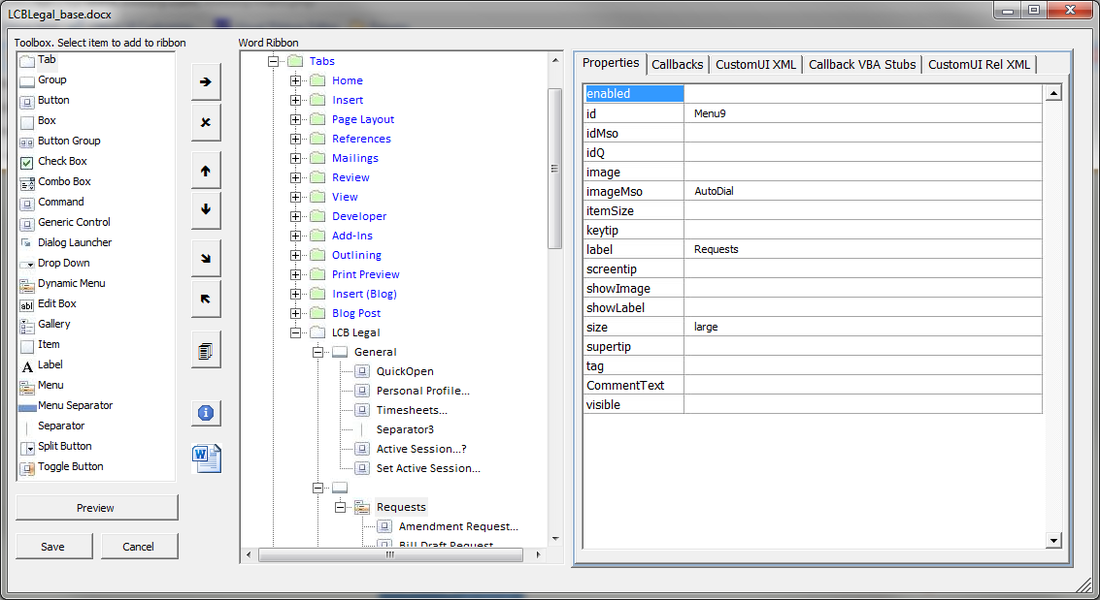 Andy Pope's RibbonX Visual Designer | 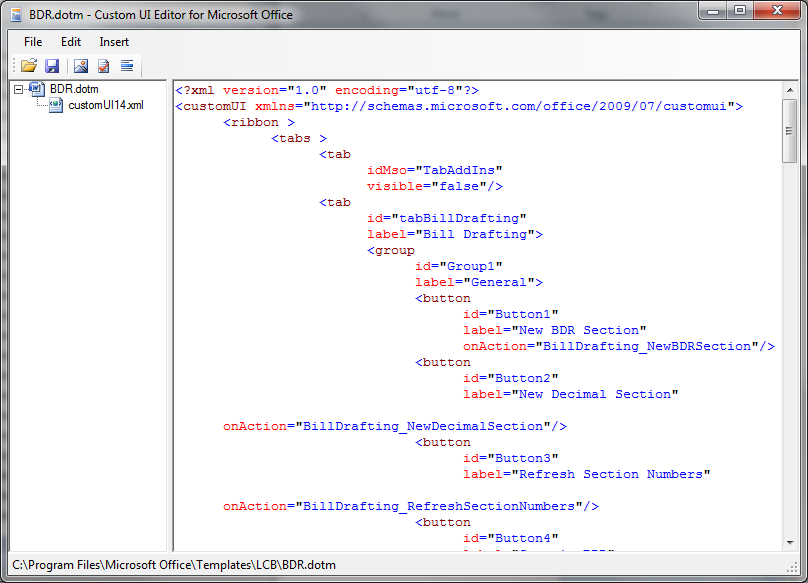 Custom UI Editor for Microsoft Office |
Since one is useful for designing the ribbon and the other is necessary for creating the actual files necessary, I use the two in conjunction. Here's how.
Your new ribbon is done! If you need to edit it again later, all you need to do is from Step 6 and beyond. Oh, all your callbacks are also automatically generated, so all you need to do is copy and paste those into your VBA code too. Of course, if you are comfortable simply writing XML code, you can either do it within the CUIEMO environment, but it really sucks with jumping around and flicker. Or you can use your favorite XML editor and copy/paste that too.
Have at it. I hope this saves someone else the difficulty I had in getting to a functional, custom ribbon.
- Open the file (.docm/.dotm) that needs a ribbon in CUIEMO.
- From the Insert Menu, select "Insert Office 2010 Custom UI Part."
- From the Insert Menu, select "Sample XML | Custom Tab." You should see some XML inserted. We'll be replacing that later with what you really want.
- If you want to add icons, select "Insert | Icons..." and add any images you want to be a part of the custom ribbon. Make note of the names, you'll need them later.
- Save and close.
- Open the .docm/.dotm in the RibbonX Visual Designer Interface.
- Customize to your heart's content. If you have decided to use any of the custom images you added to the file above, enter the name in the image property without the extension. If you want to use standard iconography, use the imageMso property.
- Click on the CustomUI XML tab.
- Select everything between the <ribbon> and </ribbon> tags and Copy.
- Save and close.
- Open CUIEMO again.
- Open the document.
- Select the text between the <ribbon> and </ribbon> tags and Paste.
- Click the Validate XML button to confirm nothing bad happened.
- Save and close.
Your new ribbon is done! If you need to edit it again later, all you need to do is from Step 6 and beyond. Oh, all your callbacks are also automatically generated, so all you need to do is copy and paste those into your VBA code too. Of course, if you are comfortable simply writing XML code, you can either do it within the CUIEMO environment, but it really sucks with jumping around and flicker. Or you can use your favorite XML editor and copy/paste that too.
Have at it. I hope this saves someone else the difficulty I had in getting to a functional, custom ribbon.
 RSS Feed